Thoughts on Black & White

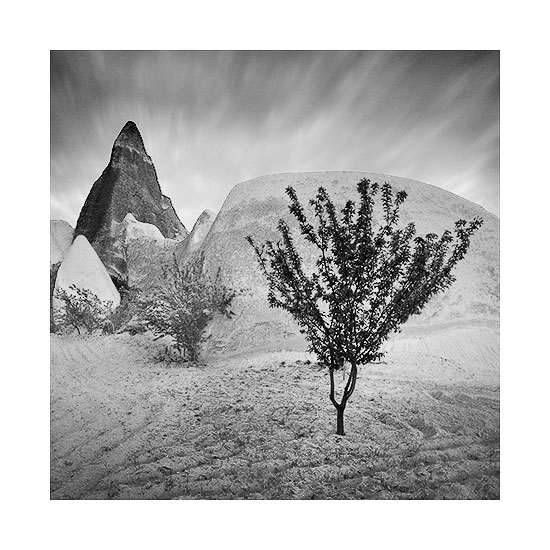
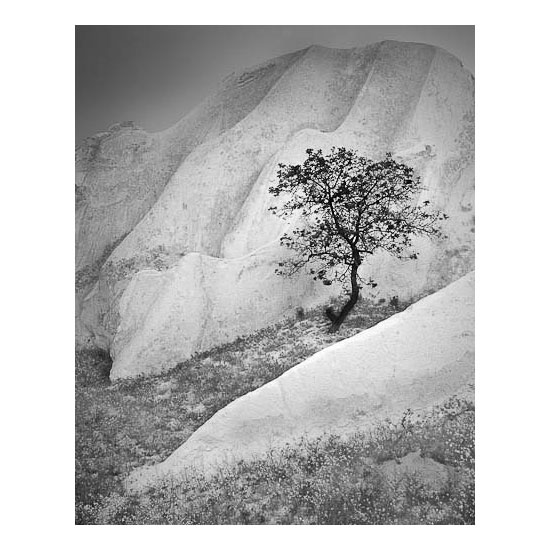
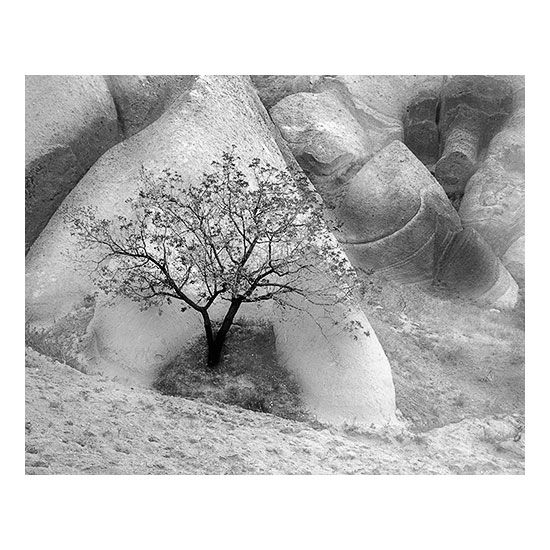
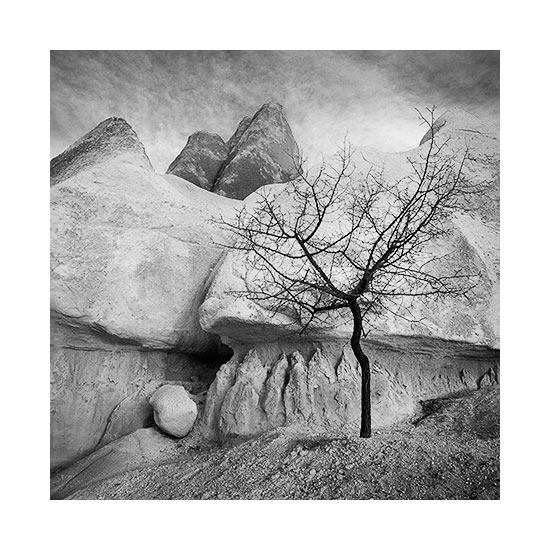
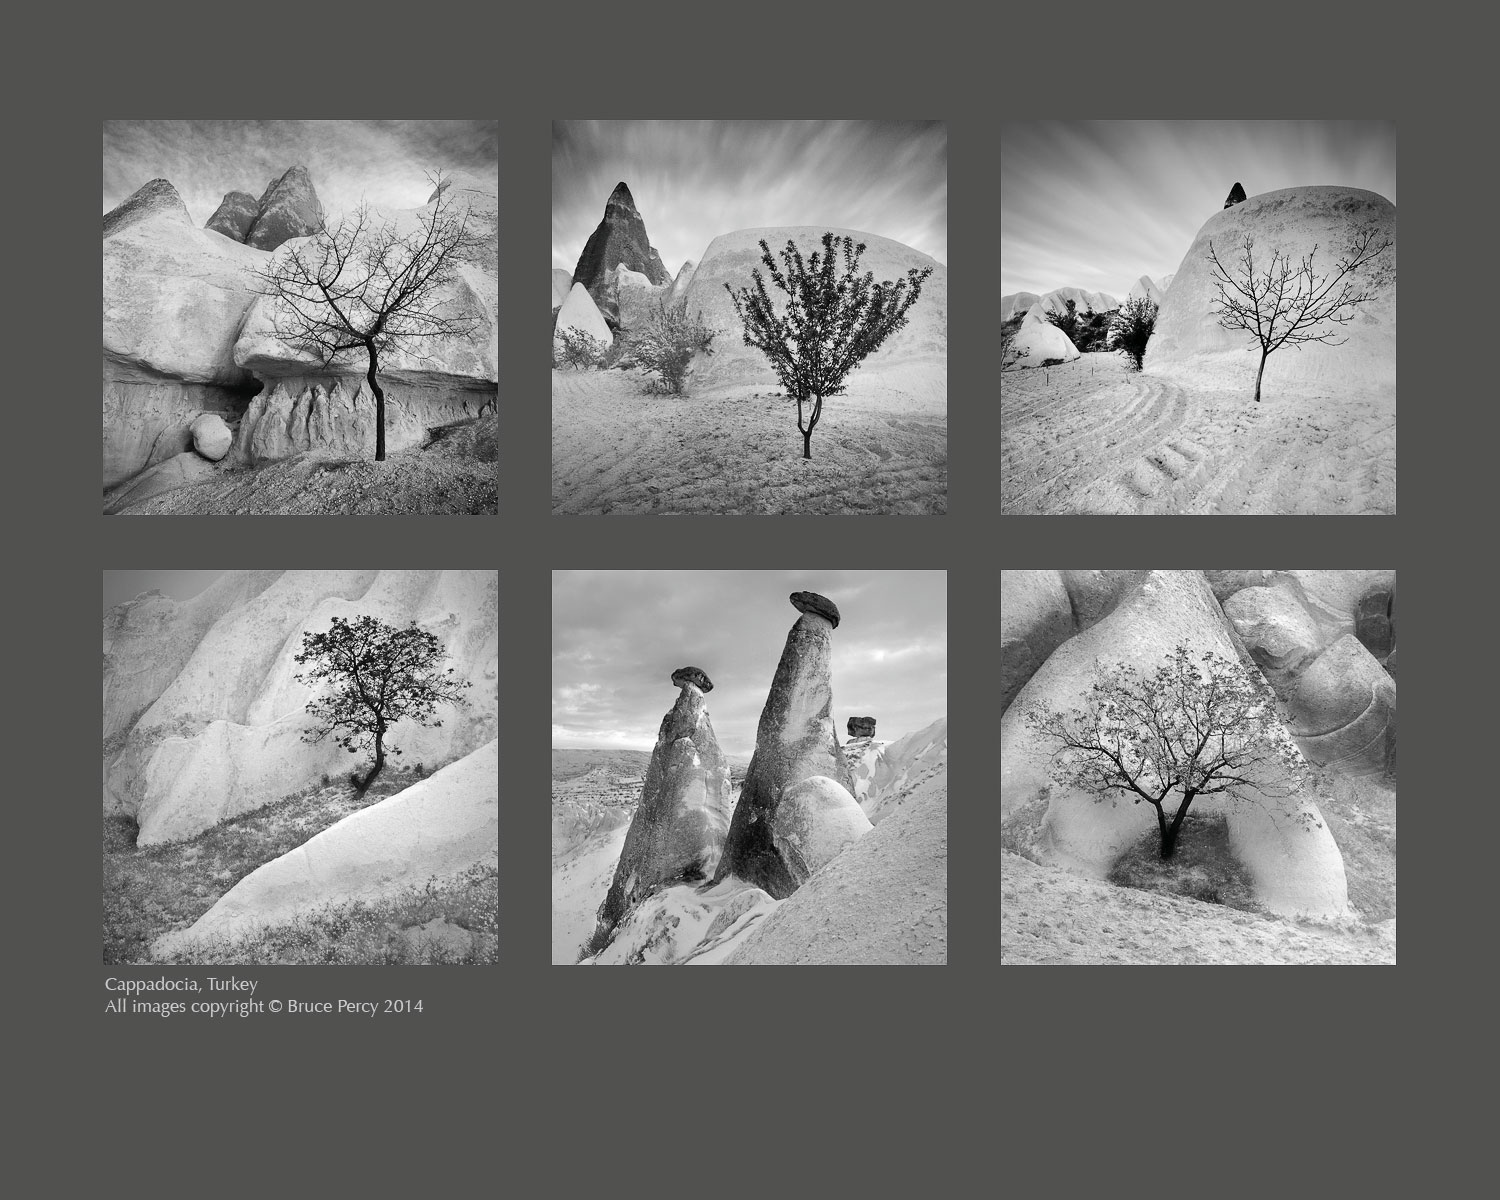
Over the past few days I've been editing work from a recent trip to Cappadocia, Turkey. The process has been a great learning one for me because I've found that working in Black & White has allowed me to focus solely on the tonal elements at play in the images. Click for full screen 24" version.

Specifically, I've had to spend a lot of time ensuring there is good tonal separation between foreground and background elements. For instance, the trees have been deliberately toned as dark as I could make them while the background tones have been lightened as far as I could, to ensure as much tonal separation as I can get away with.

Tones are one thing, but contrast is another. It's possible to convey a sense of depth to a scene by giving some objects less contrast than others. I chose to make the lighter rock formations as soft as I could - often reducing contrast in these areas. I increased contrast in select areas where I felt perhaps that a line or a curve or some other feature needed to be emphasised.

So often I feel that as beginners, most of us tend to add contrast globally but I feel that just pulls the eye in all-directions and leads to too many elements vying for the viewers attention. The image becomes fatiguing to look at for too long, because our eye is constantly being pulled everywhere.

Yes, Black & White is not just about adding lots of contrast, but also about smoothness of tone. Low contrast equals calmness while high contrast equals tension. Used sparingly, and in the right places, the eye is led around the frame in a pleasing manner.

On the subject of selection process, I shot a lot of images but I'm only left with the six you see here. I think when it came down to it, despite Cappadocia being a place of amazing rock formations, I fell in love with the solitary trees which I often found hidden away in the crevasse of a rock.

It's important for a collection of work to sit well together and this can either be achieved by collating images that have a similar colour palette, or by collecting images that have similar subject matter. I feel these Black & White images work well because they are similar in subject matter - the trees being the unifying theme here. But the compositions are similar in some ways too. But mostly I feel it's the use of tones across the collection that ties them together for me most strongly.

Editing is always a continuous case of reviewing where I'm at, how I feel about the work and it's that feeling that keeps me tuned into what needs to stay and what needs to be weeded out. Focussing on the tones in the images I shot, has led me to choose some images over others, simply because the tones were in keeping with the work I had amassed during my editing sessions.

Lastly, I've decided to present them here with a dark-grey background. Ansel Adams said that there was only one time in his career when he felt satisfied with an exhibition space, and that was because the walls had been painted olive-grey. I fully appreciate this - placing Black & White images on a white wall neutralises the white highlights of the print - which leads the viewer to perceive the print as much darker than it really is. Olive is akin to a mid-grey tone, thus allowing the brighter tones (in addition to the darker tones) a chance to stand out and sing.


The Rose, Red & Honey Valleys, Cappadocia

About a month ago, I was in the fascinating landscape of Cappadocia, Turkey. It's a beautiful landscape for sure, but I find it seems to want to be interpreted in black and white mostly.  

The Rose Valley


Black & White is not a medium i'm particularly comfortable with. It's really very, very difficult to make good images, because it is even more about form and tone than Colour is.


The Red Valley


I think Black & White is something where I have to be much more careful when isolating objects from others with similar tones. Any overlap and the eye compresses the two objects into one.


The Red Valley


Black & White also demands a sense of everything having its own tone. The trees in these two images deliberately have the darkest tones in the image - because I really wish to bring the viewers eye to them. I do use these kinds of techniques all the time in my Colour work, but I have the liberty of being allowed a little more lee-way because of the extra dimension (read that as distraction) of Colour going on, as well as just form and tone.


I'm not done editing at the moment. I've only really just started work on these, so I think things will change and morph over the next few weeks while I scan and edit. It's a very enjoyable experience to work in Black & White and to notice that sometimes I think the edit is good only to realise a few hours later, that I'm only half-way there.

Lee Seven5 Filter System Review

For a very long time, I've used Lee 100mm neutral density filters in my landscape photography. Neutral Density filters are, I feel, a vital piece of kit that all landscape photographers should own. The Lee system is in my experience the best you can get. I feel I can say this with some authority as I've had the privilege of working with all the filter manufacturers products over the past six years I've been running workshops.

Most pro-end filters are perfectly fine in terms of optics and colour rendition, but I've found many manufacturers products fall short in terms of filter holder design (i.e lack-of) or in being used in a compounded fashion - stack more than one filter together and an evident magenta colour cast will surface. It's always there, but it varies from manufacturer to manufacturer. I have however, found the Lee filter system to be the least prone to colour casts, provided that the filters haven't aged. It's unfortunately the case that all filters tend to lose the colour accuracy over time as the dyes begin to fade. All Lee filters are date stamped and they recommend you replace them every three years or so (this is usually a non-issue for me, as I tend to use them so much, that I wear our my gear a lot earlier than that).

ND (Neutral Density) filters are essential in controlling the dynamic range and exposure between ground and sky - not just with film, but also with digital capture. If you're uncertain about their benefit, then I can't state how important they are. Even the 1 stop Hard-grad is vital. But you do need to buy a good quality set. Don't cut corners by going cheap - you'll regret it.

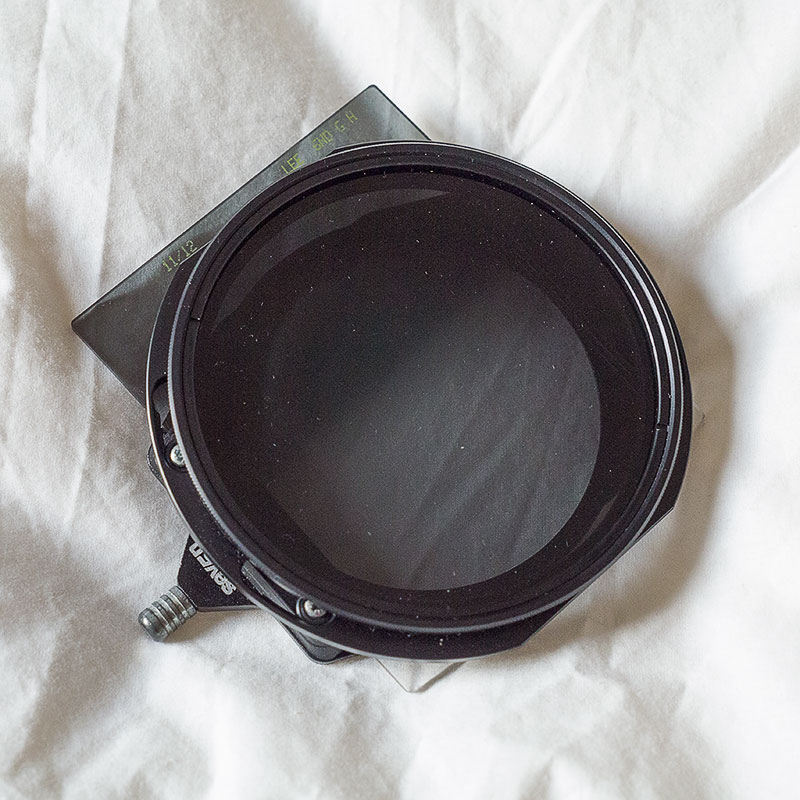
Anyway, this posting is about the miniature filter system by Lee. It's called the Seven5 filter system. It's been designed for compact systems and the filters are therefore considerably smaller than it's big-brother 100mm filters.

I've been meaning to write a review of the Lee Seven5 filter system for some time now. This review is primarily aimed at those who are thinking of using this system with a small format camera system such as a Micro-Four-Thirds format up to 35mm rangefinder.

I bought my set of Seven5 filters because I was looking for a compact filter system that would work with a little Lumix GX1 Micro-Four-Thirds system I bought for illustrative and teaching purposes on my workshops. I'm not a digital shooter, preferring to work with film for all of the work you see on this website. So I wanted a small camera format that was very compact. The Lumix GX1 along with a Panasonic 12-35 lens is what I chose, and the Seven5 filter system fitted the bill in terms of compactness.

The good

It's really compact. I like the filter holder and the adaptor rings. The filter holder is especially simple and it comes with the polariser attachment already built in.

Which brings me on to the polariser. What I've always liked about the Lee system is that the polariser fits on to the front of the holder.Which makes it much easier to rotate while keep the grads where they are. The only downside in this approach is that the polariser needs to be a lot larger to avoid vignetting (which is a costly exercise as the filter for the normal system is 105mm).

The Seven5 polariser is easy to fit onto the holder in one short rotation. The 100mm filter system on the other hand requires you to thread the filter on and off. I've never liked this - so much so - that I bought two filter holders - one for general grad use, while the other has the polariser permanently attached. It's much easier to swap filter holders than it is to thread and unthread a filter from one holder. With the Seven5 system this problem has been removed all together - it's a simple snap and rotate to lock it on and remove it quickly too. Very nice.
The bad

Whoever designed these filters for use of smaller systems assumed that the diameter of the lenses would be smaller than those of 35mm lenses, which in most cases isn't true. I've used these filters on a Micro-Four-Thirds system for a while now, and they don't cover the entire area of the lens when you wish to place the grad around 3/4 of the way up the frame - particularly when composing in portrait orientation. It's not uncommon to find the filter is not long enough with the bottom edge protruding into the lower region of the image. I think this was a design constraint to keep the whole system compact, but it does impact their use.

The other thing that I find confusing is the degree of 'suddenness' of the graduation in each of the hard-grad filters. They're too sudden for systems such as Micro-Four-Thirds or even 35mm cameras.

I have some thoughts on why extremely sudden grads don't work with small-format systems.

Hard-Grad's tend to be more obvious on wide angle lenses than telephotos because when a shorter focal-length is used, we're really zooming-out of the image and are therefore zooming out of the graduation. If we go the other way and go up the focal-lengths, then we're really zooming into the graduation - so the graduation becomes more and more diffused as we zoom up. So using sudden graduations like the ones that Lee produce for the Seven5 system on systems such as Micro-Four-Thirds where the focal lengths are smaller - (for example - an equivalent angle of view to 50mm on MFT is 25mm), it becomes apparent that the graduations are going to be more evident.

I should at this point make it clear that I use hard-grads most of the time. They are used far more often than soft grads - which are really for use in controlling more gradual tonal changes across the entire frame rather than for controlling the contrast between sky and ground. So it's not that hard-grads are too sudden in per se - they're not - they usually work very well for most of the situations I encounter in my landscape work. I do get emails asking about the correct placement, but these questions usually hint at the wrong strength of filter being used - if you can see the graduation - it's probably because you're using too strong a filter.  Hard grads aren't too sensitive to correct placement provided the strength is about right.

One last thing, I wish someone would produce a nice little filter bag for the Seven-5 system. I don't see the point in owning small filters, only to store them in a large bag. It kind of defeats the purpose of going compact.

In Summary

So my two main issues with this filter system are this:  Using it with small format systems, the filters are often too short (have less travel than I need for grad placement) and the hard-graduations themselves are too obvious / sudden.

If you already own the Lee 100mm filter system, it would recommend buying these for one reason - if you feel going compact is of the utmost importance for you. I can fully appreciate that a compact filter system for Leica Rangefinder users and smaller formats is very attractive. It certainly was for me when I chose to buy these.

Although the 100mm filters are considerably larger and bulkier, the graduations and filter-travel are just about right for using on any system from Micro-Four-Thirds upwards, so again, i'd only opt for the Seven5 system if compactness is the driving force behind your need to buy them.

Despite these points, I'm still happy I bought mine and I've learned to live with the limitations of the filter system because for me, it's the compactness of the design that was the essential aspect of buying them in the first place.
Revising 'Simplifying Composition' e-Book

Way back in 2010, I published an e-Book about composition which I sell on my on-line store. It is the basis for an introductory talk that I give on the first night of my workshops here in Scotland. I've found it to be a great way of setting the theme for the week ahead as it lets participants think about shapes and tones with the aim of simplifying their compositions.

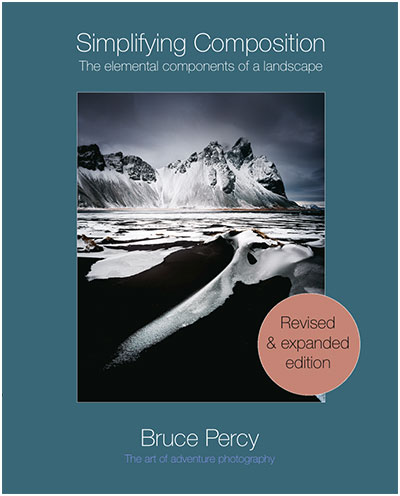
SimplyCompositionExpanded It's been a few years now since it was published, and I've run many workshops during that time. I've discovered along the way, that each workshop I conduct has provided me with some new level of awareness about composition or my approach to photography in general.
So I've been thinking for a while now, that it was time I updated it. Only, now that I've begun work on it - it's turning into a substantial re-write.

For those of you who own the original, the newer version has a much clearer message about diagonals, curves, s-curves, balancing compositions and contains additional techniques I've learned to help me double-check my compositions at the time of capture.

I think I am always learning, always progressing at what I do, and there is always part of me studying that change in myself. I'm someone who is highly reflective about my art (aren't most artists?) and I'm very aware that there is always a degree of continuous self-improvement at play.

Sensory Numbness?

I'm on the isle of Jura on the west coast of Scotland this week for some private time away from running my workshop business.

It's so quiet that we've been discussing how just the little noises seem to be the main background soundtrack to life here. For instance, the water in the nearby stream and the wind rustling through the leaves of the trees and of course the bird song, are our new audio backdrop.

And this has got me thinking about a time I used to visit my dad, when he lived on the isle of Seal (an even smaller, quieter Scottish island). Where he lived, there was no city-noise - no noise pollution to speak of. When things get so quiet, you tend to notice the smaller sounds.

I remember one night hearing a car which sounded like it was maybe just outside the house. My dad told me it was perhaps a mile or so away and this made me realise that in towns, the background-noise levels are so high, that I've gotten so used to filtering it out, to not pay attention to it.

The same can be said about light. At my dad's house, with no street lights - it was so dark outside -  that I couldn't see two feet in front of me. I had to go back to his house to get a torch so I could go and fetch something from my car just outside. Another time I was visiting, the moon lit up the landscape for miles and I could see without any need for a torch.

I think that when we live in cities, we are bombarded by light and sound pollution. So much so, that we spend most of our time filtering it out. We learn to become sensory-numb to our surroundings, otherwise it's simply too much to handle.

In landscape photography, having a keen sense of visual awareness can help improve our compositions. I've noticed over the years of running workshops that many participants tell me it takes them a day or two to get into the mode of 'seeing'. I'm wondering if it's because we have taught ourselves to filter things out whilst living in cities and when we venture into nature, we have to reverse that, and pay attention to even the smallest visual detail. This takes a lot of effort and 're-learning'.

While I was running a workshop on Eigg, we had the sun rising behind us. Everyone wanted to go that direction (I personally hate shooting into the sun or towards a sunrise or sunset), but I maintained that we stay where we were, as during sunrise and sunset, the colour temperature all over the sky is really beautiful - not just in the direction of where the sun is. My reason for staying where we were was because the tones are easier to shoot at 180 degrees to the sun.

I think it's very easy to latch on to the obvious blazing sunrise or sunset colours, and to believe that the colours are only evident in the direction where the sun is, but if we take time to consider the softer tones around the entire sky, we can see that they are evident everywhere. Only we tend to filter them out. I think this is a case in point of us looking but not 'seeing'. In other words, we are filtering out qualities in the landscape because they are too subtle for our overly de-sensitised nervous system.

Before I finish this post today, I'll tell you one more account. Last year while running a workshop on the same island, we were looking at the clouds being lit up by the sunrise and I asked each member of my party what colour the clouds were. Half of them stated that the clouds were grey while the other half correctly stated that the clouds had a magenta colour to them. It's interesting to see that some of us have to work hard to notice the subtle differences in tone and colour around us.

In our everyday encounters, we are very seldom asked to consider colours, or subtleties of tone. I think this is perhaps why many of us love photography in the first place - because it allows us the luxury to spend time thinking about aspects of the world around us that we rarely get a chance to enjoy.

Being a good photographer has always been about 'seeing', not just looking. I wonder if our city environments are teaching us bad habits by encouraging us to adopt a level of sensory numbness?


Heading towards the edge? Then take your time.

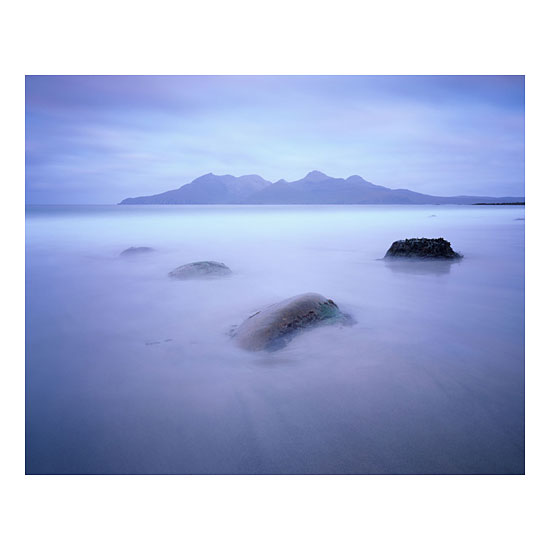
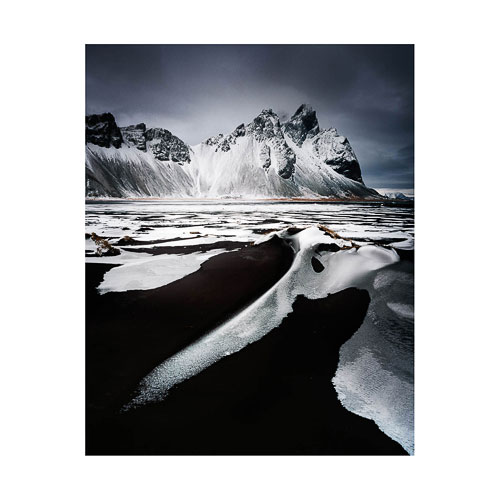
A few months ago I posted an article about using focal lengths, and more precisely, how they can be used to control the balance or dominance between foreground and background subjects.Stoksness, Iceland

In it, I spoke about how it's not uncommon to be attracted to the edges of a landscape. For instance, I'll often find myself heading towards the edge of a lake, or the edge of the sea and I've also found myself on occasion close to the edge of a cliff.

If my habit is to always go straight down to the edge of the sea/lake/loch/cliff, this can be a real limitation in terms of controlling background and foreground dominance. As explained in my previous article about focal lengths, part of my technique in balancing foregrounds with backgrounds is by how near/far I choose to be to my foreground. Anything at infinity stays at infinity and does not change in size as I move ten feet forward/back but my foreground changes in size dramatically. By automatically heading towards the very edge of a lake, I'm reducing any opportunity to use this technique to it's fullest.

I'm also losing out in another way too though. I miss out on exploring the parts of the landscape that I pass over to get to the edge of the water. This is the main point of this post today.

I've often found many great compositions whilst on the way somewhere. I think this is because as much as I can latch on to one area of a landscape and feel it might be very interesting to work with, I actively keep my mind open to finding and noticing other things while I make my way towards it. I'm just wondering though - is this something you do when you choose to head from the car to a designated spot?

A little bit like a life-metaphor, I think we can often miss out on opportunities as photographers because we're too focussed on being somewhere else.

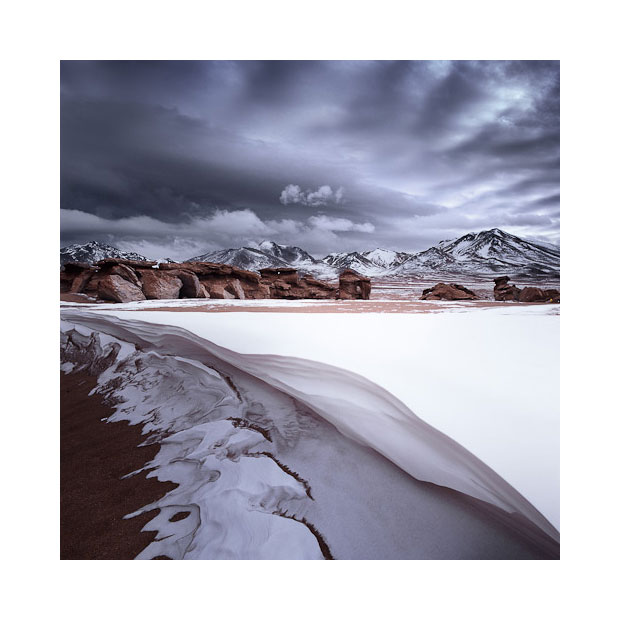
Siloli desert, Bolivia

These days, I like to start at the back of a beach and slowly work my way forward. I'm well aware that small areas of a landscape can yield interesting compositions and I'll often find myself working with an area of a beach which is around 4 feet long for an hour or so.

This is why I prefer prime lenses because they force me to fit to the landscape, rather than me command the landscape to fit to my own rules. With a prime lens, I'm forced to move around to fit things in, whereas with a zoom it's often too easy to feel I can just stay in one spot and change focal lengths to get everything to fit together. By doing the later, I miss out on finding new compositions in my immediate surroundings whereas with the  former, I'm encouraged to explore.

I feel good photography is not simply about technique or being there at the right time. But more about temperament - how patient/impatient I am, and how I tend to latch onto an area of the landscape and become blinkered and ignore the rest.

Self-awareness, of knowing how I can behave,  has become  a vital photographic skill for me. I know I can sometimes choose to close my eyes to many photographic opportunities. Just having this knowledge has helped me reconsider what I may be passing up on - particularly so when I'm heading towards the edge of landscape.

Thoughts on the impact of equipment change

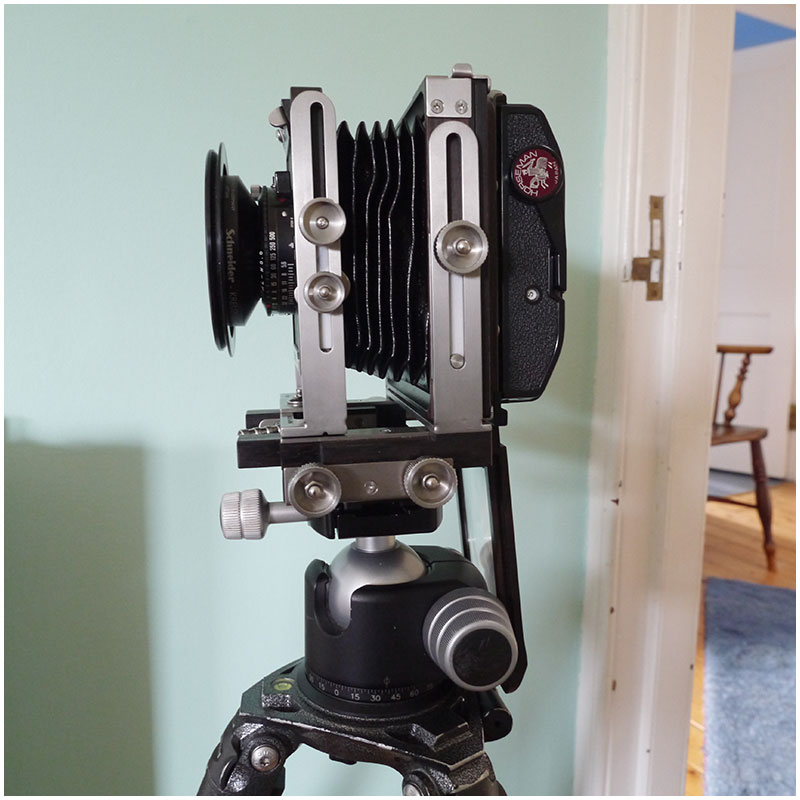
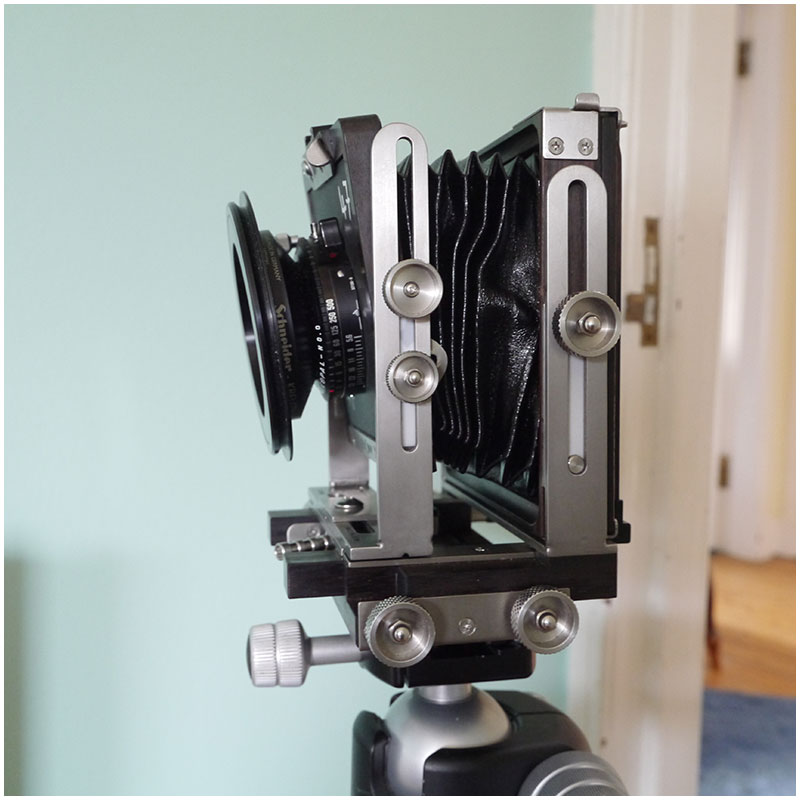
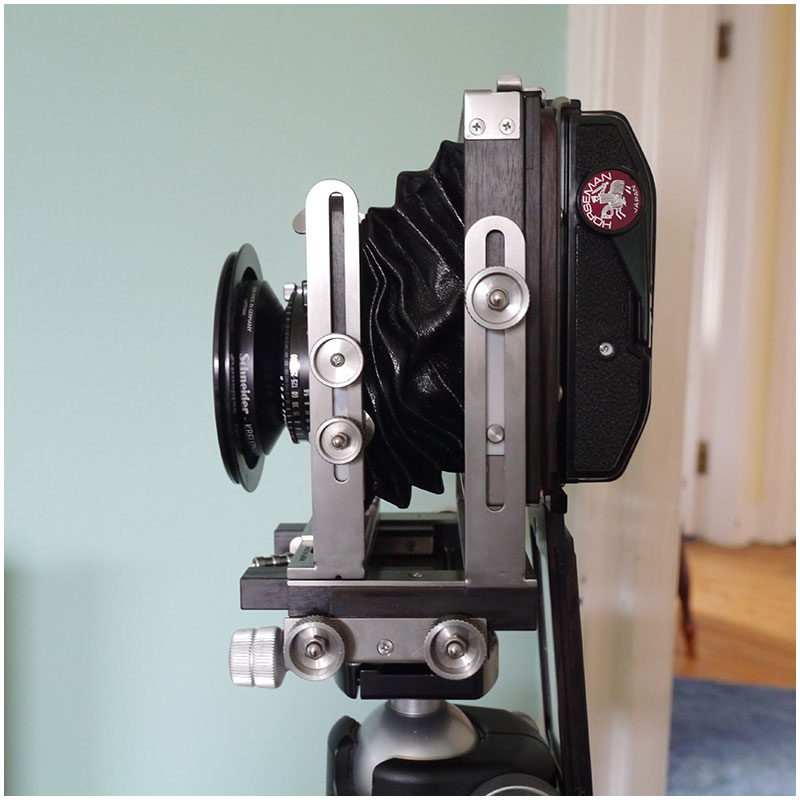
This year I re-entered the world of the field camera. You may think this camera is a large format 4x5 inch system. It's not. It's actually a medium format 6x9cm field camera, only I'm using it with a 6x7cm film holder. So it's really a 6x7 medium format film camera with the added benefit of having tilt, shift and swing movements. Many Canon and Nikon users can buy tilt-shift lenses for their fixed plane camera bodies, for me, I bought a camera with tilt-shift-swing movements built into the body not the lenses.

Because it is not a large format camera, it's much smaller and lighter than you can imagine from looking at the photographs here. I just took this little system with me to Turkey a few weeks back and I carried it onto the plane in a waist-level bag including four lenses (38, 47, 65, 80), light meter, filter case and my entire film stock. I don't like to travel with multiple formats if I can avoid it - too many options make for a confusing time and I wished to get to grips with this system while I was away. There's no better way to do that, than to leave every other camera (read that as 'crutch')  back at home.

So why did someone who already owns three different medium format outfits buy a fourth one? Good question.

My answer is that I'd been feeling restricted by the lack of movements in my fixed plane camera bodies. Working with medium format often means that I'm working within a range of narrower depth of field's than someone using smaller systems.

I know for instance that with my Hasselblad 50mm or my Mamiya 7 50mm, the closest I can get to my foreground subject is about 1 metre. For those of you who don't know much about medium format, a 50mm lens is equivalent (I must stress - in angle of view only) to a 24mm lens in 35mm format. I still have the depth of field properties of a 50mm lens, because a 50mm lens is a 50mm lens, no matter what format of camera you bolt it onto.

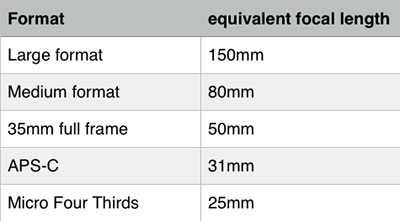
Shorter focal-lengths provide more depth of field than longer focal lengths. And this is affected by the choice of format you decide to use. Use a small format such as Micro-Four-Thirds and your focal-lengths are half of what they are with 35mm. Consider the following table. If you were to aim to get the same angle of view as a 50mm lens in 35mm format across other camera formats, you would use the following focal lengths:

But bear in mind that you have a lot less depth of field at 150mm than you do with a 25mm lens for the same aperture. You can see how focal-lengths affect depth of field by playing with an ultra-wide lens and a 200mm lens. When you attempt to focus an ultra-wide lens, it kind of feels as if nothing much changes right? That's because even wide open, most of the scene is in focus. Whereas with a 200mm lens, you find that the focus has to be extremely precise.

Back to my choice of field camera. Most 35mm shooters using a 24mm lens can get as close as 2 feet to their foreground and keep infinity in focus. With my medium format systems - I can't. The closest I can get is 1 metre, and that's all because I'm using a focal length of 50mm to get the same angle of view as your 24mm lens. One way I can get round this problem is to use tilt (see picture below for front standard tilt):

The other reason I chose to get a field cameras has to do with converging lines. I've been finding many subjects I wish to shoot don't work if I have to point the camera up or down at them. For instance, those lovely red huts in Lofoten can only be photographed if I'm exactly parallel to them. If I point the camera up, my subject starts to lean back, if I tilt the camera down my subject starts to lean forward. See picture below for an example of how to look down but also keep vertical lines straight (not converging). Notice how the film plane is level - the camera has not been pointed up or down:

I think buying new gear should always be done with a lot of consideration. We often think about the benefits of what some new equipment may bring, but rarely do we think about the consequences it may have on our existing workflow. I'm always concerned that I may lose something I value in the process of changing something.

For example, I had been using nothing much else but a Mamiya 7 outfit for around 12 years with only 3 lenses. I am so used to visualising compositions in these three focal-lengths and also in a 6x7 aspect ratio. I think my compositions got better and better over the years because I was so tuned into using the same tools time and time again.  Around 2010, I took on a Hasselblad (which has a square aspect ratio) and when I did, I did it knowing it would take me at least a few years to settle into it (it did). I felt I might find that it changed the way I see compositions and I was concerned that I might find my compositional-abilities disrupted by the change. So I knew about the possible impact, and took on the change with a lot of care for my creativity.

And now that I've just bought an Ebony SW23 field camera, I've been very careful to buy the same focal-lengths as my Mamiya camera because I didn't want to affect the way I visualise. Changes to my process are always done in small, almost organic steps.

So now that I've re-entered the world of the view camera,  I've already told myself it will take time. A lot of time. And to be patient. I'm very self-aware of my creativity and I like to observe how things morph and change over time. That is one of the most beautiful things about photography for me.