I’ve just completed the sequencing and ‘grading’ of the images that will be in the Hálendi book. I feel I’m getting closer to the completion of the book.

two-pages of the book as they are intended to be laid out.
I just need to proof the work now, and make sure that what I am seeing on my monitor holds up when it’s printed. I’ve been a little bit delayed in doing this for the simple reason of running out of ink for my printer late last week! Seems it’s impossible to buy ink for next day delivery here in the UK and I can only assume it’s because I’m using an older printer.
Proofing, as the name suggests, is about simulating how the images will look once printed on the paper of your choice. It’s really useful to help you figure out if there will be any significant loss of contrast, colour or anything in your interpretation that is critical to keep. The reason why you may lose something while printing is because each paper has a reduced contrast ratio and gamut of colours. So something will get lost in the conversion.
Since the contrast ratio of a piece of paper is much smaller than what a computer monitor can display, some images may not transfer well when being squeezed down to work on paper, and compromises will have to be made to allow the image to be acceptable to you.
Every device out there has its own physical limits to the gamut (range of colours) it can reproduce. Colour management is often more about managing how you deal with out-of-gamut colours as you move from one device with a large colour gamut to one with a smaller one.
This is where rendering intents come in. Intents allow you to chose how ‘out of gamut’ colours are treated. You essentially get to choose how the compromise is made. For example, one rendering intent says ‘any colour that is easy to transfer over with no change, do it, but any colour that is outside the gamut of the new device, move the colour to the nearest available one’. You have a options and the best way to work out which rendering intent to use, is to proof the image on your monitor and flip through all the rendering intents to find one that gives you the closest match to what you hope the image will look like in print.
Truth is, rendering intent should be chosen on a case by case basis per image + media combo. One image may print well on one paper but less so on another. Experimenting (in proof mode) with different rendering intents per image on your chosen paper will give you the best compromise. You may find that one rendering intent does a better job at giving you a closer rendition of what you intended.
Proofing is important because it allows you to cut out a lot of guess work. You essentially see the image as it will look once printed - on the chosen media, while saving on paper and ink.

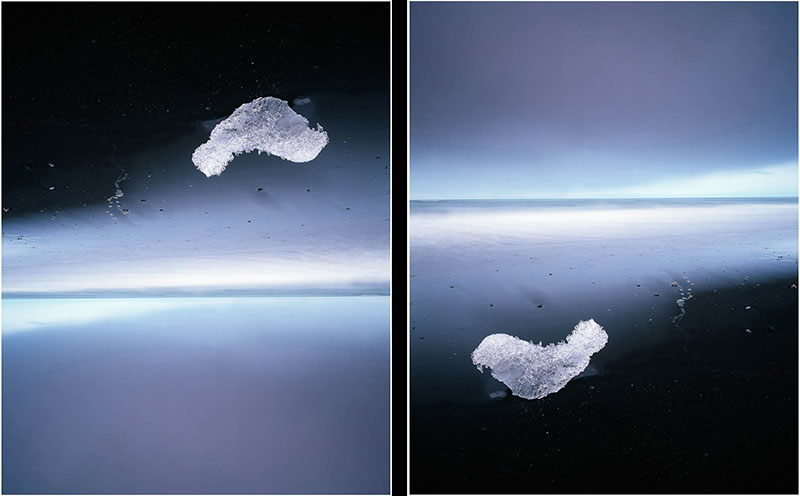
Proofing off. Note the whiteness of the paper.
In the image above, I’ve got proofing switched off. When you edit your work, you should always work with proofing switched off. You are editing an image which is neutral of any medium you print it on.
When you come to print it, that is when you should make a copy of the master file and perhaps name it for the paper of choice it’s intended to be printed on. Then while proofing is switched on for your duplicate file, make adjustments that are relevant for the paper you are proofing under.

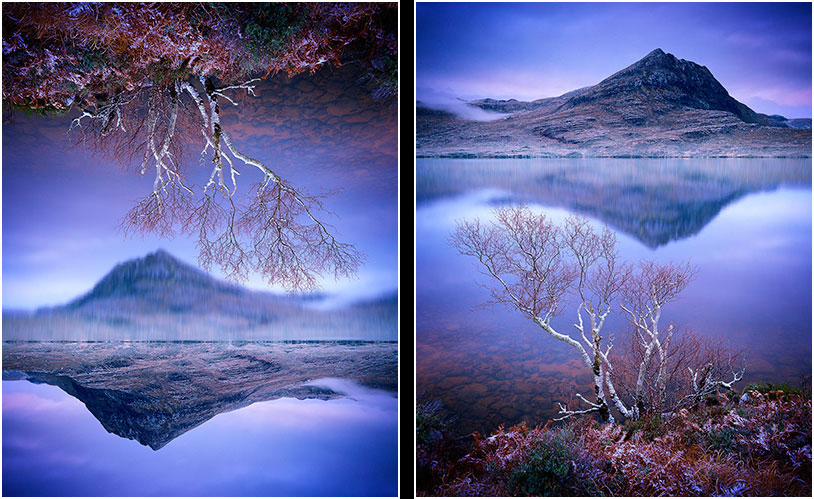
Proofing on. Note that the colour of the paper is now duller. This is the proofing simulating the paper colour.
The image above illustrates what may happen when proofing is enabled. You can now see that the whites of the border have dulled down a lot (to simulate the colour of the paper). I notice the two images have less ‘presence’, but after a few seconds my eye adapts and I start to believe that the images look as powerful as they did with the proofing is switched off. This is key.
The eye is highly adaptable, to a point. We’re also extremely poor at judging relative colour. Have two slightly different prints and place them in separate rooms, and walk between both rooms - I doubt you will notice any changes in the images. But side by side - that’s when you’ll notice colour differences. So the eye is easily fooled.
Most of the time when you proof, the images should still stand up, even if it is now being simulated on a less contrasty, less dynamic medium. But occasionally I find some aspect of the image that is important to me becomes lost. In these cases it’s either that you’re working with the wrong medium. Certain papers excel at colder / whiter images than others. A warm paper will smother snow scenes for instance. So you need to experiment and find the right paper with the right gamut for your image, or try to make adjustments (with proofing switched on) to see if you can regain what you lost. I usually find the solution is in the former option. Not all image work well on all papers so paper choice is critical.
In the case of my own proofing this week for my book, I have no choice in paper. I am using a proofing paper that gives me a reasonably close rendition of what an offset press can do. So I’ve found one or two of the images has required a lot of work to get it to sit well on the page.